Building a 42-Key Corne Split Keyboard - Part 3
Switches, Keycaps, and QMK Firmware
2023.12.02 - Connor Shugg
Mechanical Keyboards
Ortholinear
Split
Corne
CRKBD
Switches
Gateron
Keycaps
QMK
C
Firmware
In the previous blog post, I fumbled around with a soldering iron until I managed to fully solder both PCBs for the 42-key Corne Keyboard (crkbd). In this post, I walk through my assembly of the keyboard case, installing the switches and keycaps, and flashing QMK firmware.
Installing the Switches
Thanks to those handy hot-swap sockets I soldered to the PCB, installing the switches was as simple as carefully plugging each one into the two open holes on each socket.
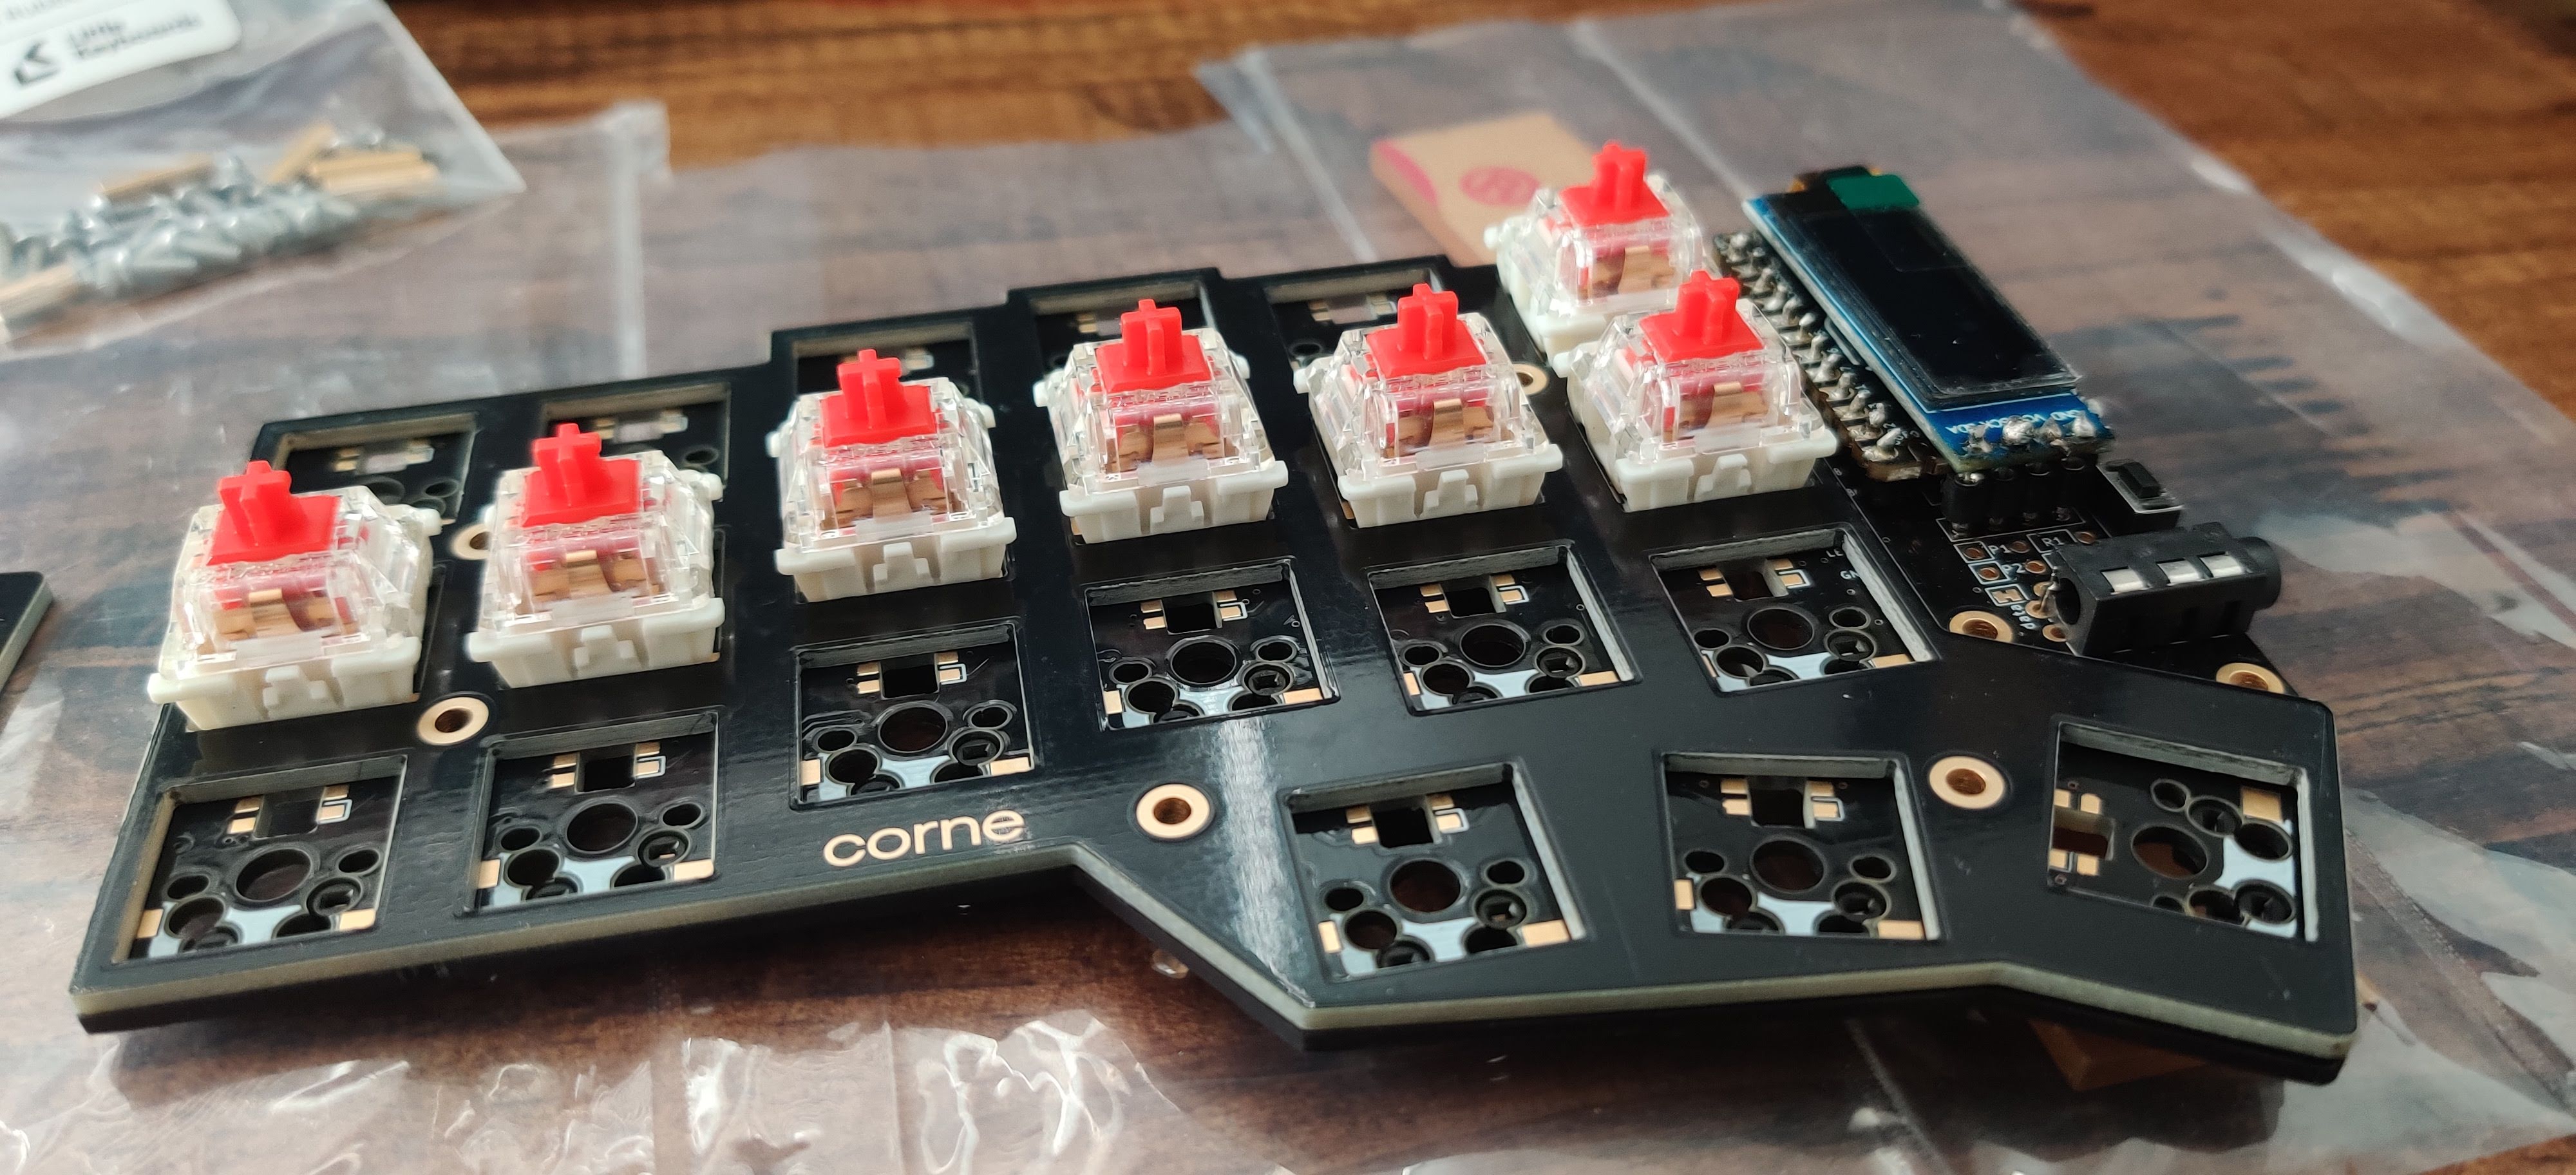
The Case
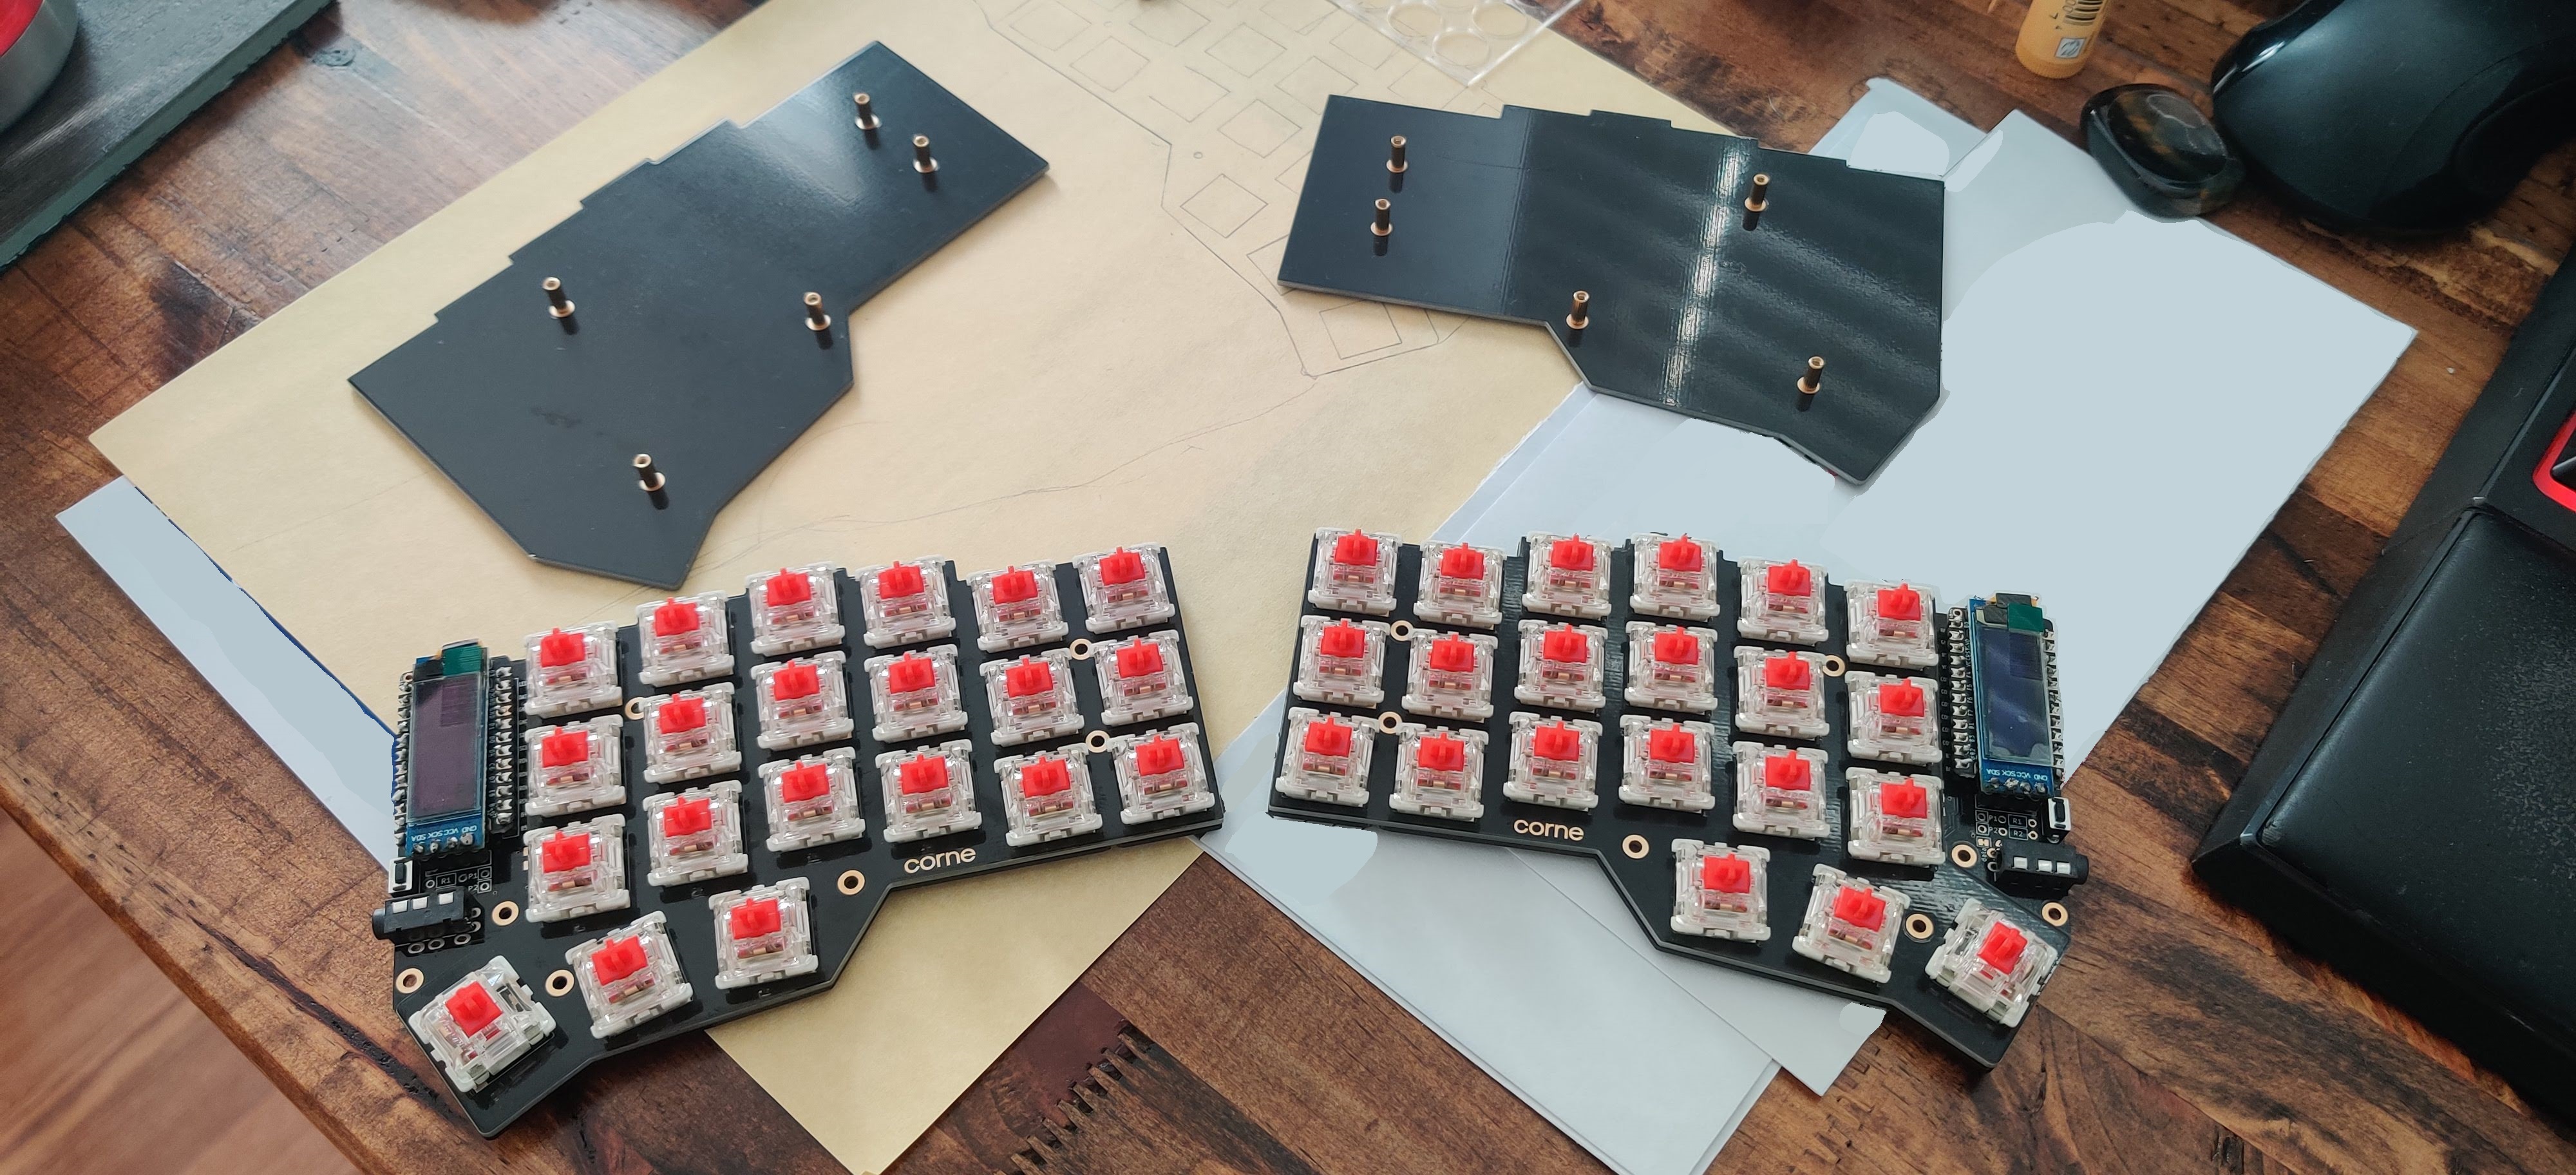
The extra layer you see on top of the PCB (with the word “corne” written on it) is part of the case I ordered. This portion protects the top of the PCB and leaves the sockets open for installing the switches. There’s also a bottom portion of the case to protect the bottom side, which I installed soon after the switches:
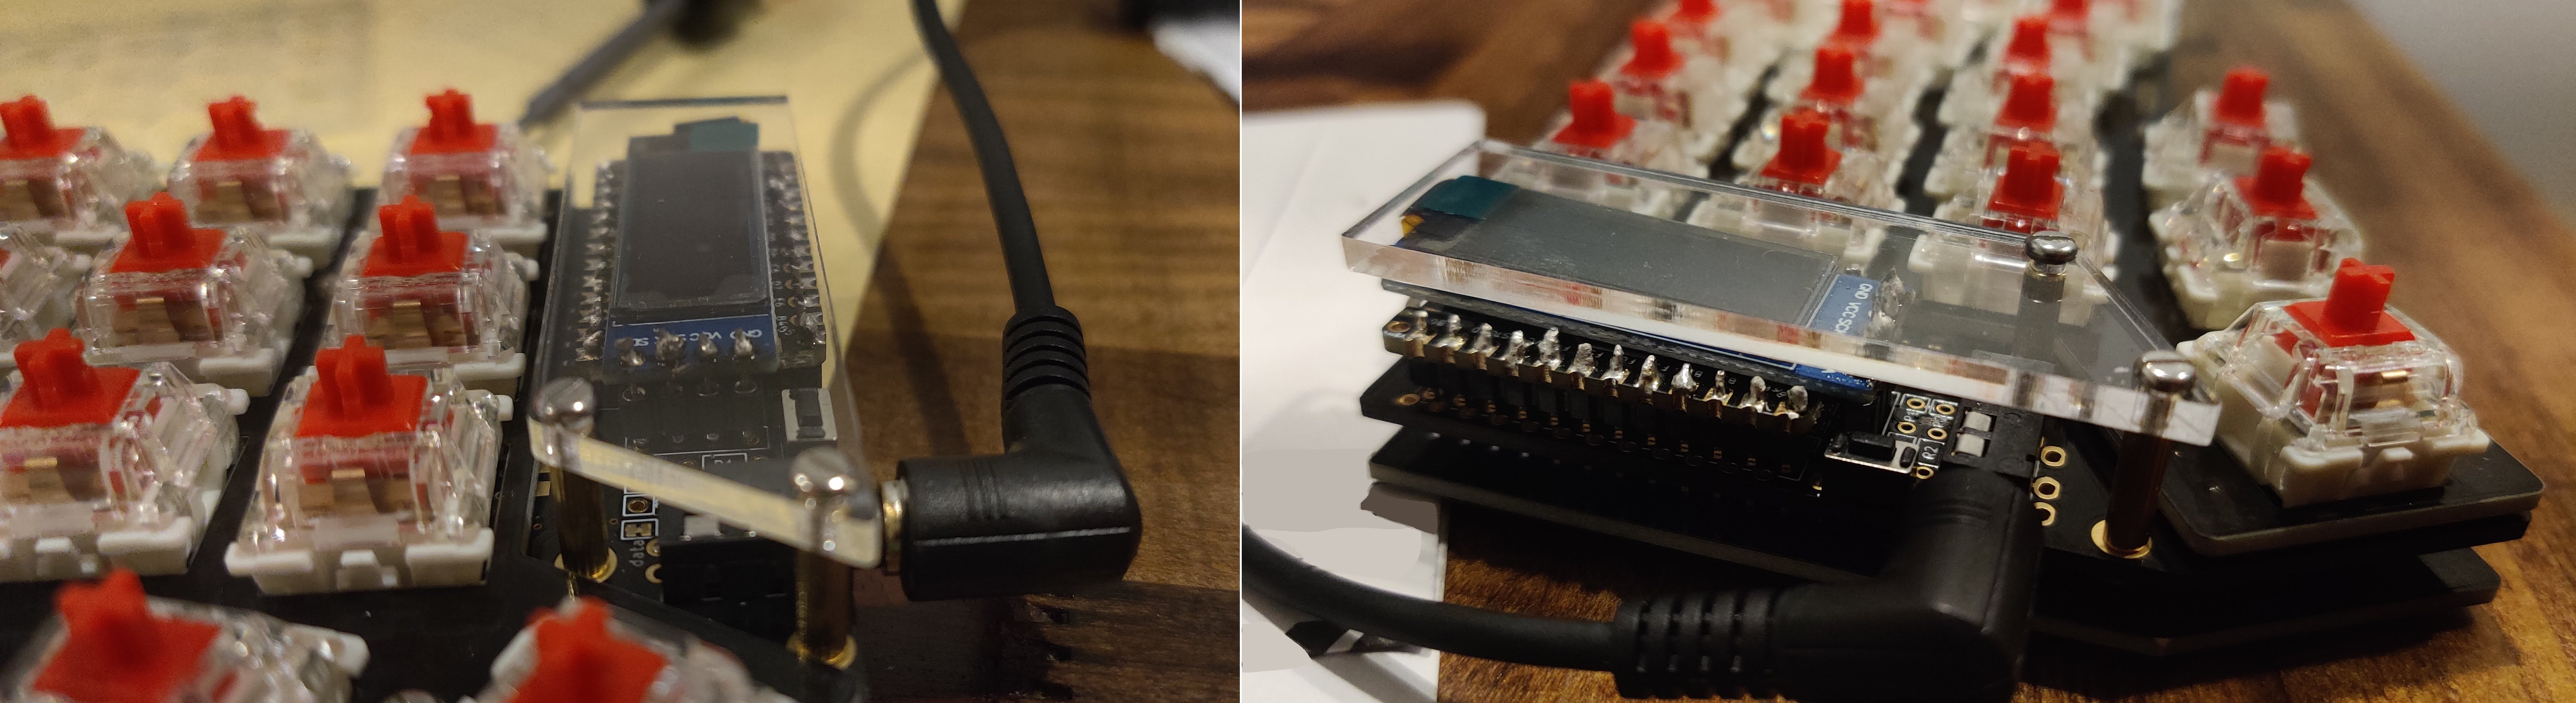
The last pieces of the case was a clear acryllic cover to protect the Elite-C and the OLED screen. I installed this, plugged in the TRRS cable, and fired up QMK Toolbox to flash the firmware.
Flashing QMK
QMK is very well-known firmware and was written specifically for driving keyboards. The QMK community has built in support for lots of custom keyboards, and the Corne is one of them. There’s lots of documentation on how to build, modify, and flash QMK to microcontrollers such as my two Elite-Cs.
I used the QMK Toolbox on my Windows PC to
flash the compiled & assembled binary to each microcontroller. It’s a very
simple GUI application that allows for quick selection and flashing of the
.hex file produced after building QMK.
You don’t need to look far to find excellent documentation and tutorials on building and flashing QMK, so I’ll spare you the details. Let’s see what the default firmware looks like!
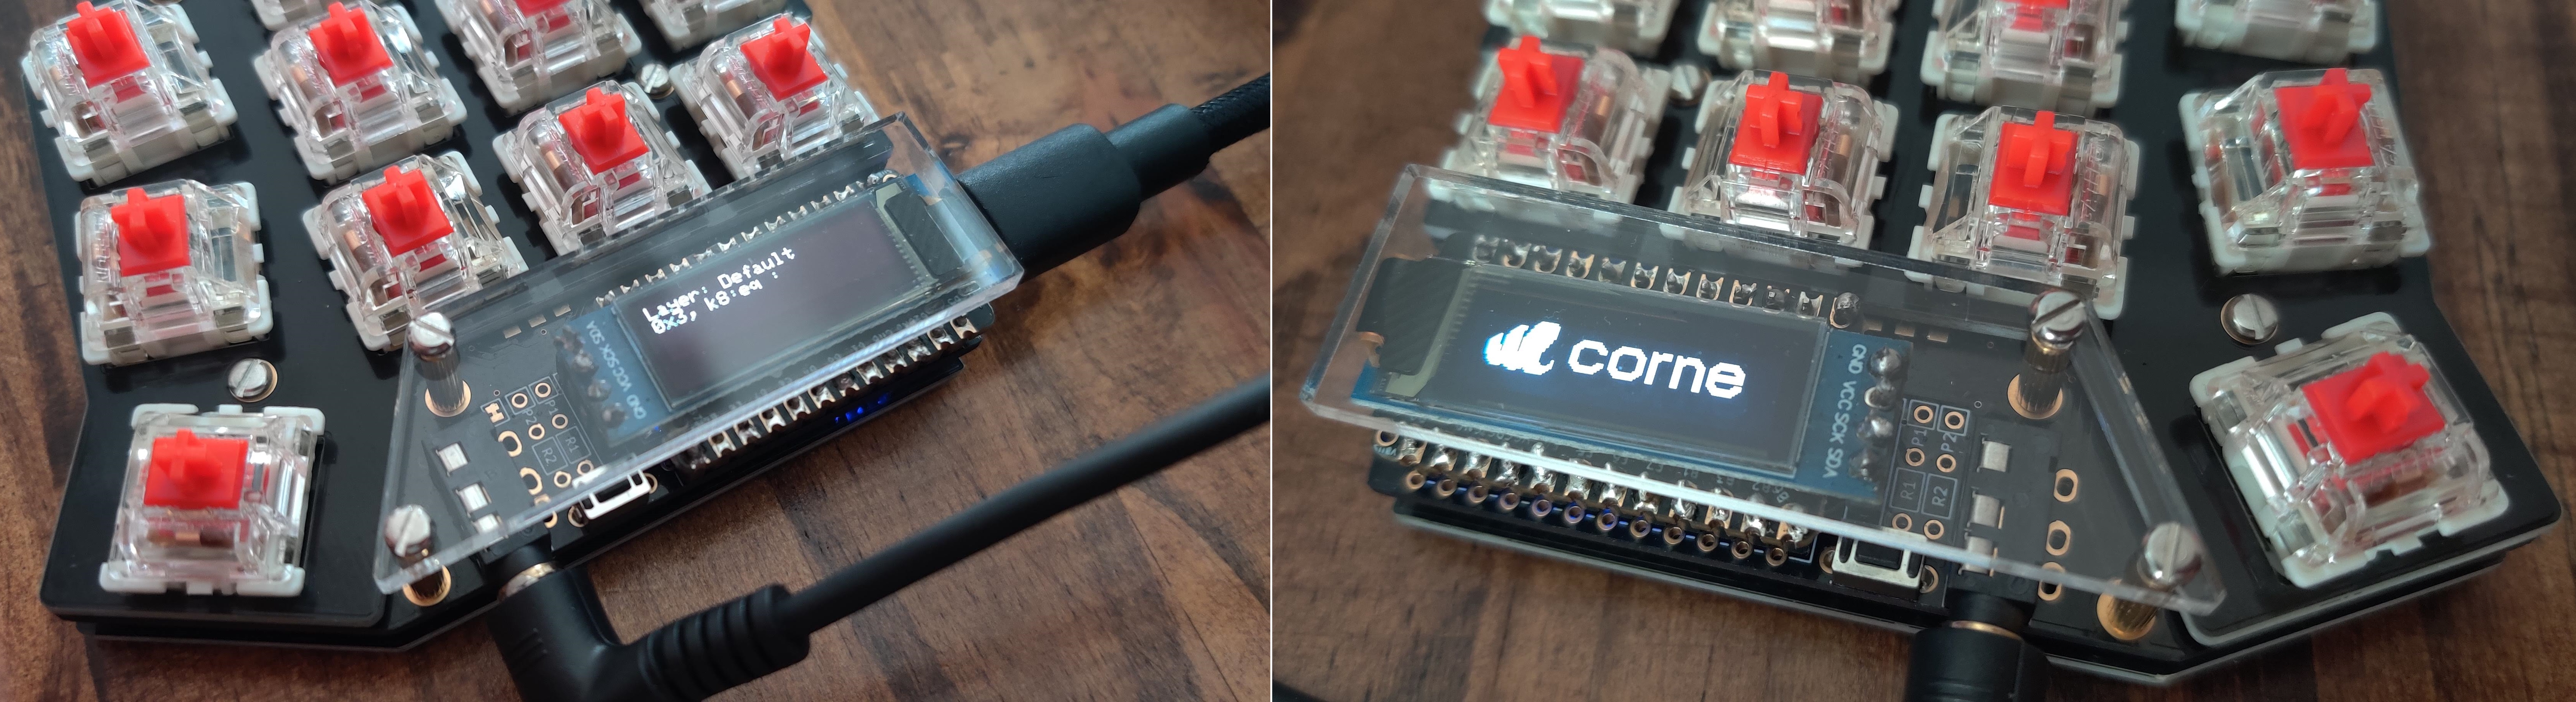
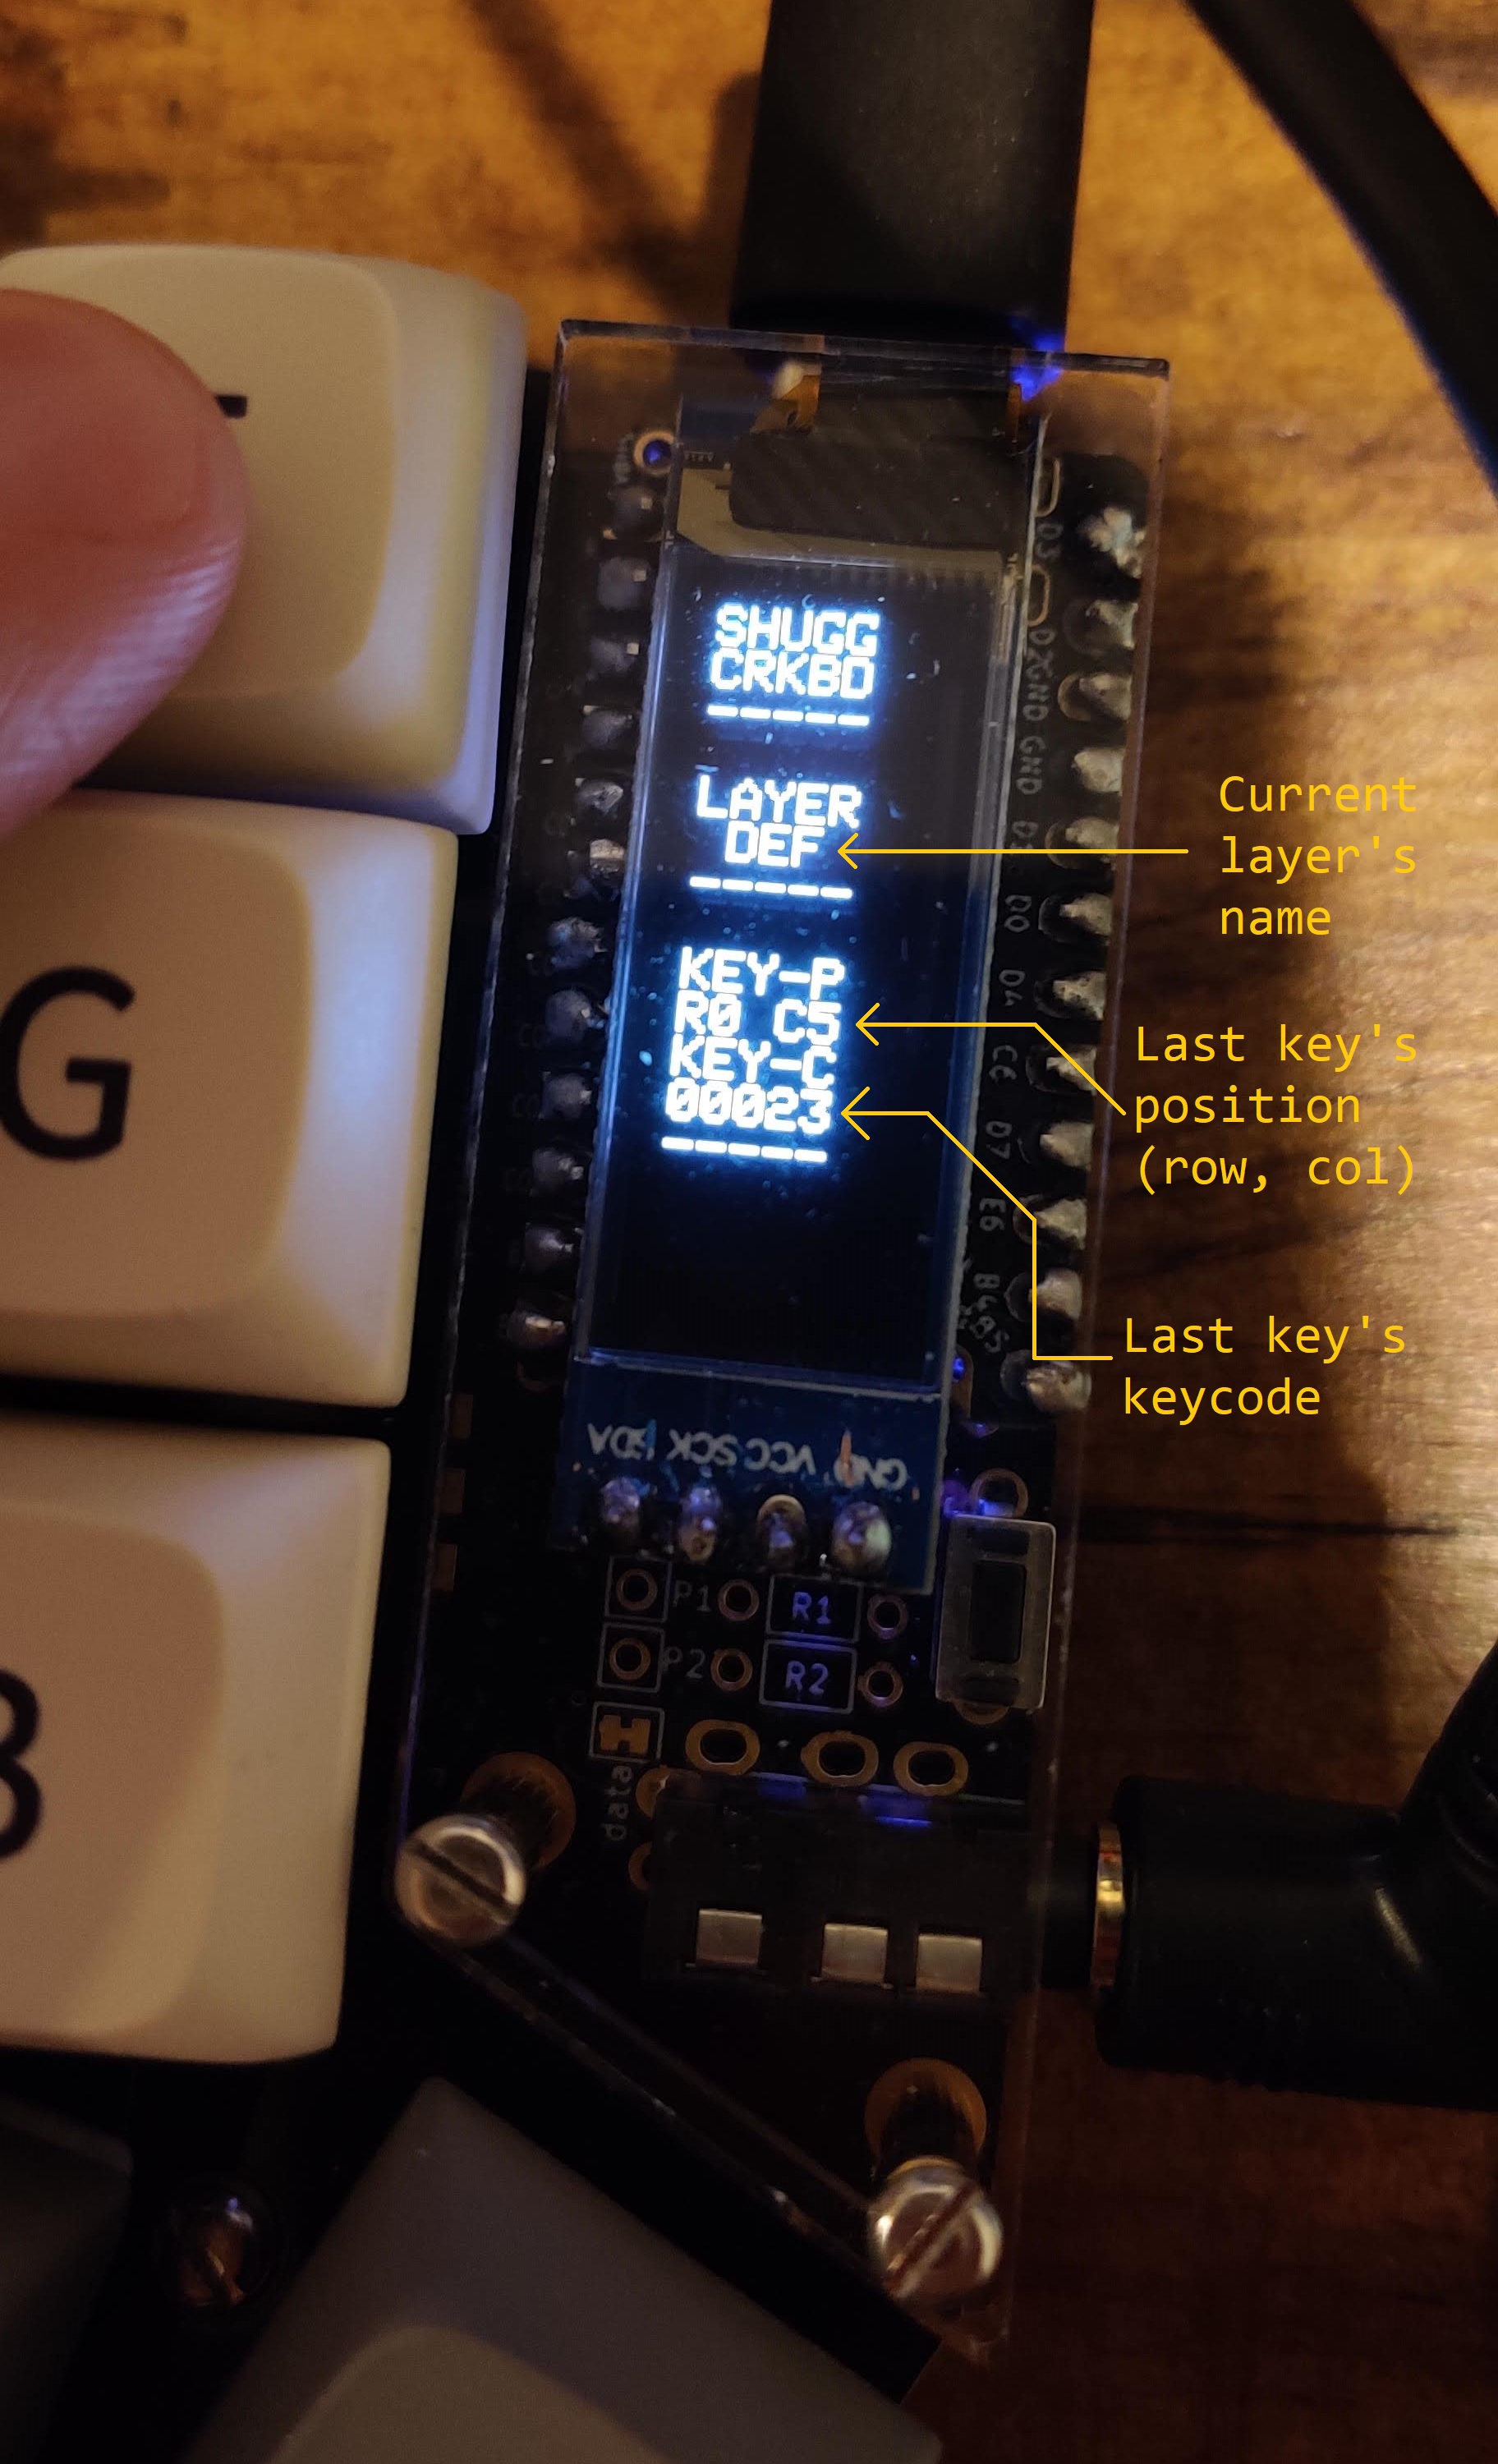
On the left-hand screen (which is designated as the “master” side of the keyboard), a simple print-out of the current layer, followed by the latest key that was pressed, is displayed. The right-hand screen shows the Corne keyboard logo, followed by the word “corne” in a larger font. Nice!
Testing the Keys
I used the left-hand screen to test each of my switches to ensure they eached registered as a key press. I wound up having to re-solder a few of the Kailh hot-swap sockets around the keyboard (my initial soldering joint wasn’t strong enough, and snapped away from the PCB after a few key presses). I repeated this process multiple times: testing, taking the keyboard apart, fixing some solder, then buttoning it back up again. Tedious as it was, this was the final hardware-related hurdle. Once all the keys worked, I moved onto installing the keycaps.
Adding the Bling
A keyboard isn’t truly a keyboard without actual keycaps for your fingers to press. I found this part of the project to be very satisfying. I refined my original keycap layout and landed on this:
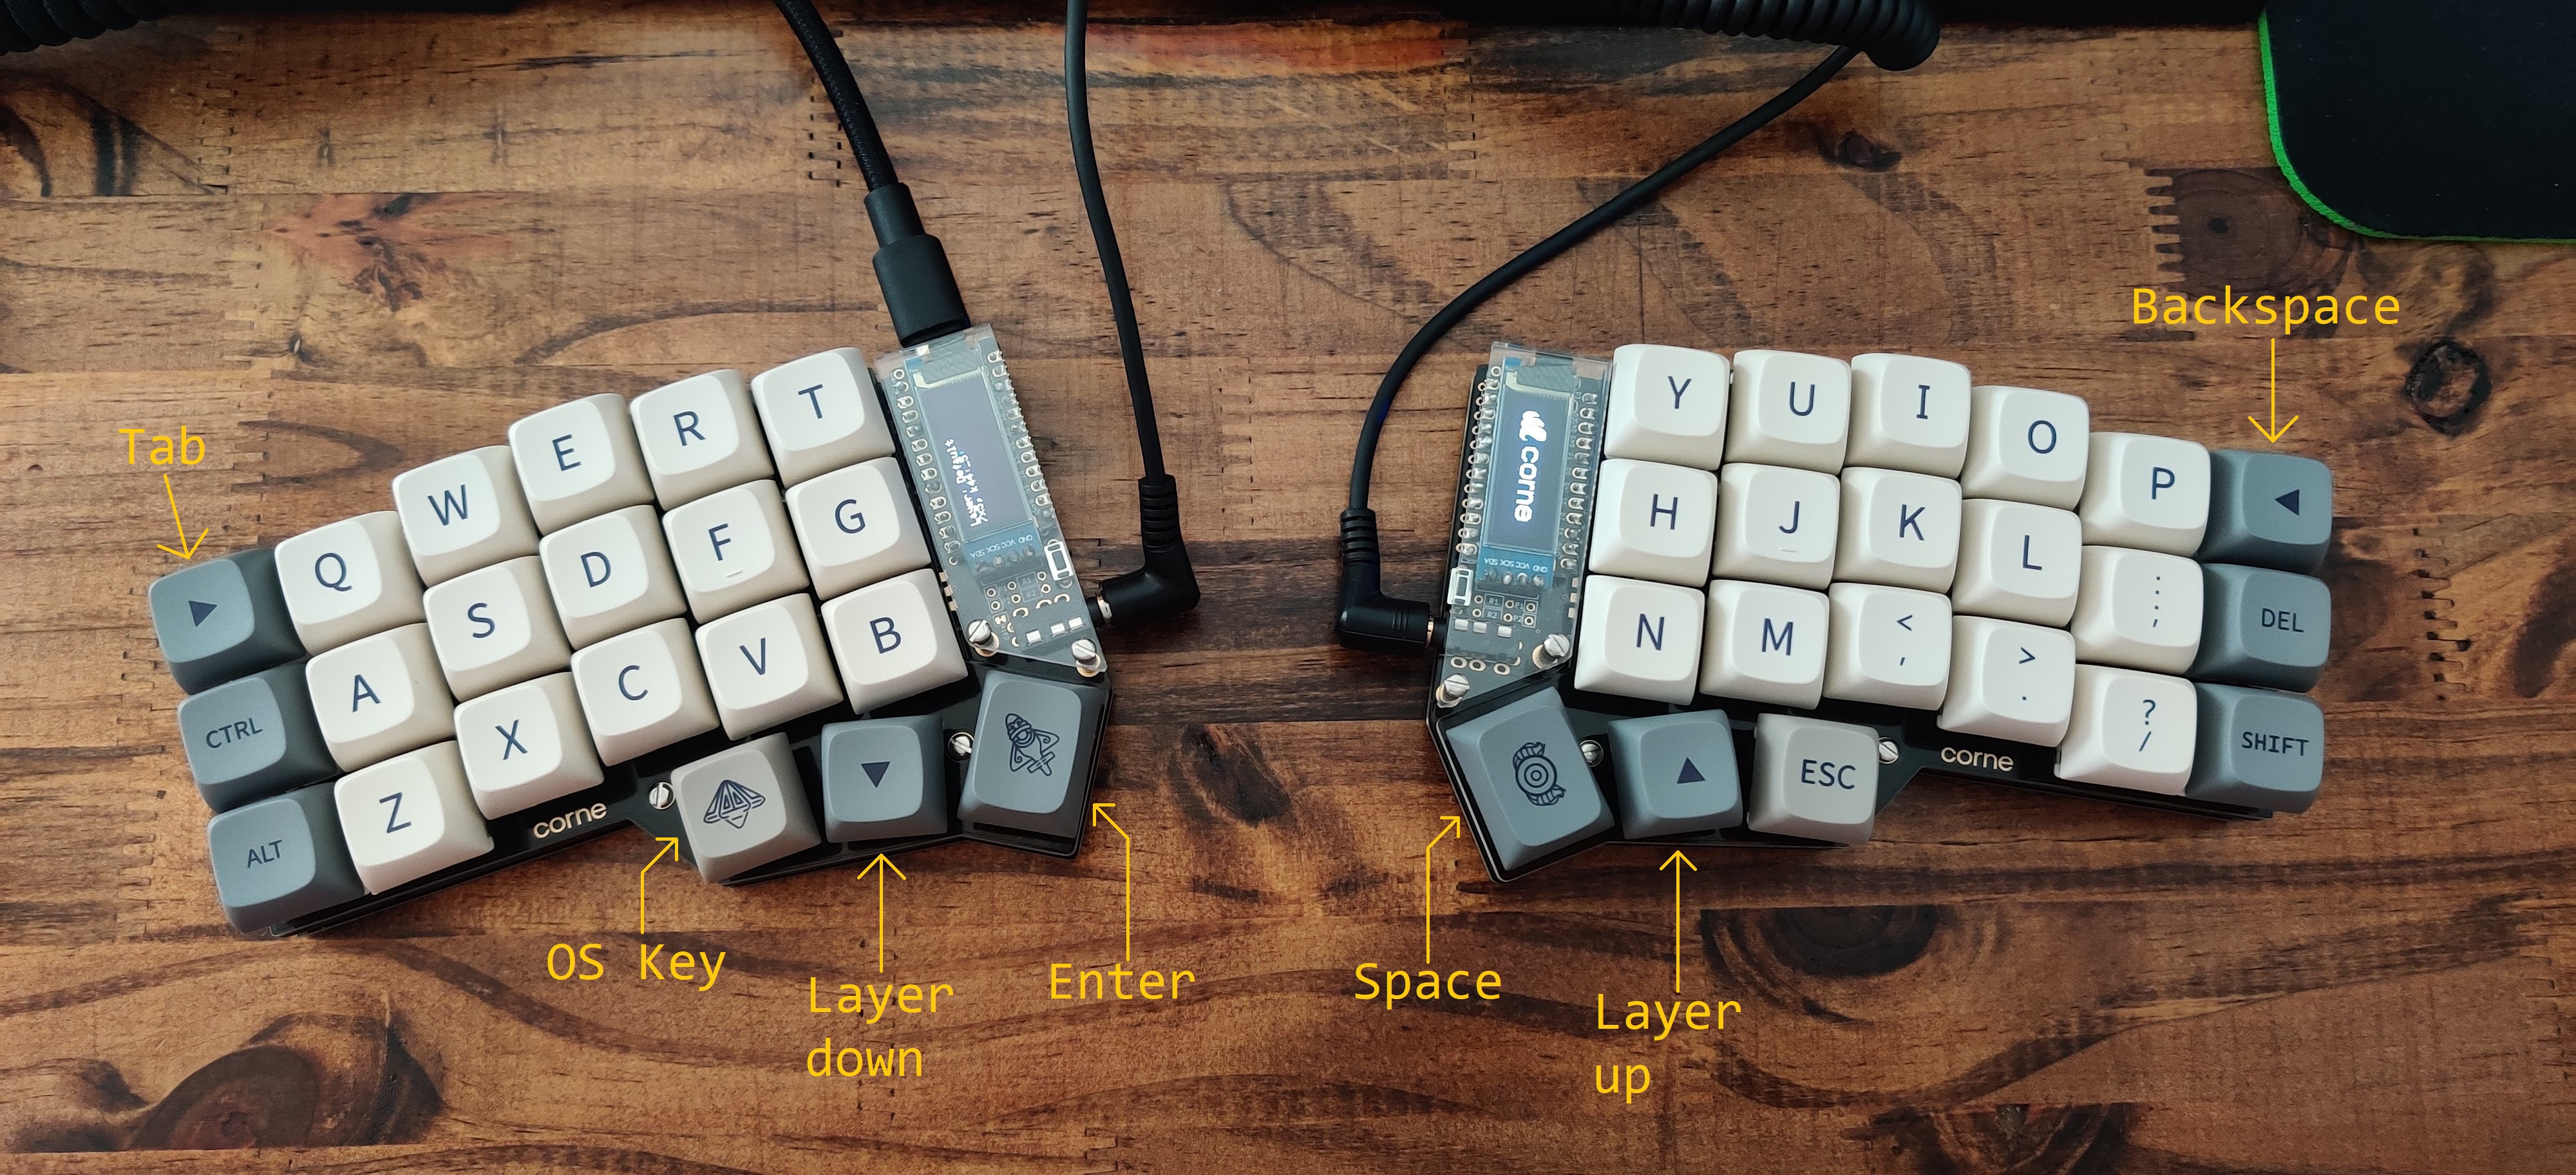
Of course, that layout is only the default layer. Several other layers exist, and can be moved to using those “layer up” and “layer down” keys. That’s where the QMK customization comes in.
Customing QMK
With the full keyboard assembled, I spent time writing my own C code to customize my keyboard’s key mapping, OLED screen content, and overall behavior. My implementation is open-sourced on GitHub.
Key Mapping and Layers
At the time of writing this, I implemented a total of eight layers in the keyboard:
- The Default Layer contains all 26 letters of the alphabet, the common modifier keys (Ctrl, Alt, Shift), and a few others. (This layer is what the keycaps correspond to.)
- The Lower Layer, which is accessible by holding down the “layer down” key, contains numbers, a few mathematical symbols, and media keys (volume up, volume down, next song, play/pause, etc.)
- The Raise Layer, which is accessible by holding down the “layer up” key, contains all other symbols, arrow keys, home/end, and page up/page down.
- The Super Layer, which is accessible by holding down both the “layer up” and “layer down” keys, contains the function keys (F1, F2, etc.), and a special way to navigate to the gaming layers.
To navigate to my gaming layers, I tap a specific key in the super layer three times. Once that happens, the keyboard permanently switches to gaming layer 0.
- Gaming Layer 0 is a near duplicate of the default layer. The space bar is duplicated to be on both sides of the keyboard (so I can use my mouse with my right hand).
- Gaming Layer 1 moves all the numbers to the left-hand side of the keyboard (again, so I can use my mouse).
- Gaming Layer 2 is a near duplicate of the raise layer.
- Gaming Layer 3 is a near duplicate of the super layer. In this layer, the same special key that originally takes me from the super layer to the gaming layer, instead permanently takes the keyboard back to the default layer.
OLED Customization
I also spent some time writing code to customize the content on the two OLED screens. At the time of writing this, I’ve only given the left-hand OLED screen a job; the right-hand screen is off. Here’s what I cooked up:
Eventually, I’d like to add a display of what modifiers are currently active (caps lock, ctrl, alt, shift, etc.), and I’d like to give the right-hand screen something else entirely to display.
With that, the keyboard is complete. Switching from a standard keyboard to a split and ortholinear keyboard has had a learning curve, but it’s been fun to learn it. I plan to finish this project by building a nice wooden case for both sides of the keyboard, complete with the ability to tilt the keyboard outward to better support my wrists. We’ll see when I get around to that!